Curious to learn how to improve navigation or increase sales? Adding an accessible cart button in WooCommerce is the key.
The “Add to Cart” button in WooCommerce lets your customers to easily add products to their shopping cart, which is very important for your online store’s success.
In this guide, we’ll walk you through step-by-step instructions on how to easily add a cart button, ensuring a smoother checkout process and maximizing customer satisfaction.
A step-by-step guide for adding the “Add to Cart” Button in WooCommerce
If you haven’t set up your “Add to Cart” button yet, don’t worry. Follow these simple steps:
Install and Setup
- First from your WordPress dashboard’s “Plugins” section ensure that the WooCommerce plugin is installed and activated.
- Navigate to “Products” > “Add New” in the WordPress dashboard.

Adding the Add to Cart button
- Enter the product name, Description, Price, and other required details. If there is a sale on the product then enter the price in the Regular Price and Sale price sections, and the sale will display on that product.
- Enter the product’s price, as the “Add to Cart” button will only appear for priced products.
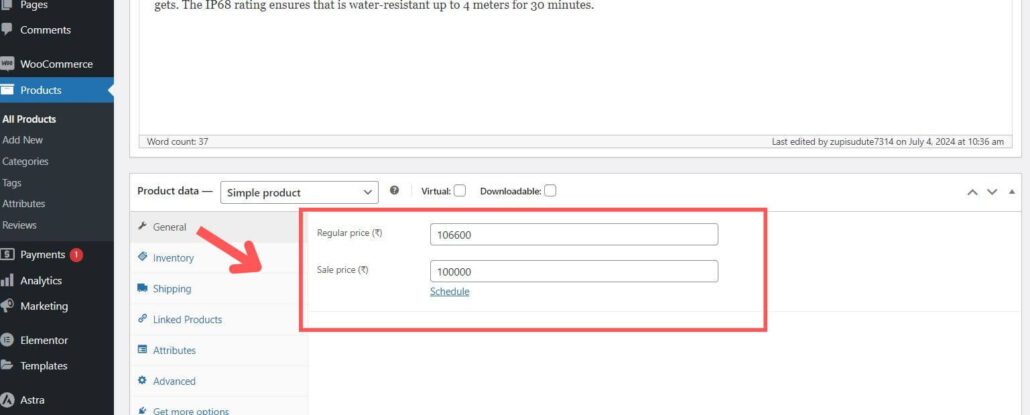
- Want to change how prices are displayed on the front end? Change the currency in the settings options that appear after clicking on WooCommerce.
- After making all the changes, click “Publish” to make the product live on your website. Once the product is purchasable, your website page will display the “Add to Cart” button.
- Now preview the changes, the add to cart button will be added to the front end.

Now that you know how to add the “Add to Cart” button in WooCommerce, you’re ready to improve your online store’s navigation and boost your sales. By following these simple steps, you ensure a smoother checkout process and improve customer satisfaction. To make your WooCommerce website more engaging you can check our other guides.

