Want to create stunning timelines for the Divi theme?
If you want to showcase your company’s history in a visually appealing way, then you need the Divi Timeline Module. With this plugin you can easily showcase key milestones in your company’s journey.
Follow this simple guide to create your timeline stories for the Divi theme:
Step 1: Installaion & Setup
- First install the Timeline Module For Divi plugin from WordPress.org.
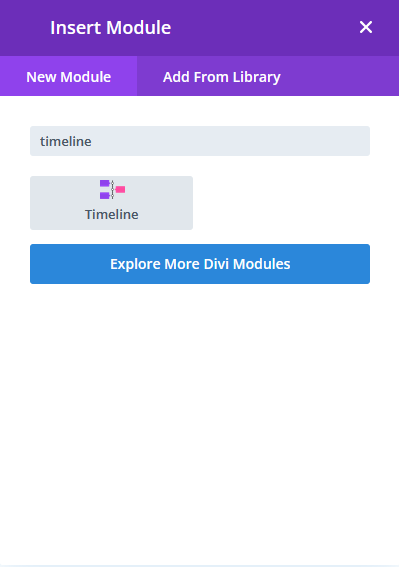
- After successfully installing the plugin, add a new page or edit the existing page with Divi, and search for “Timeline” inside the module section.
Step 2: Adding and Editing Timeline stories
- After adding the Timeline module to your site, three default timelines with dummy content will appear on the page. You can fully customize these timeline stories according to your preferences. The Timeline module for Divi comes with three variations of the Vertical timeline:
- both sides
- one side left
- one side right
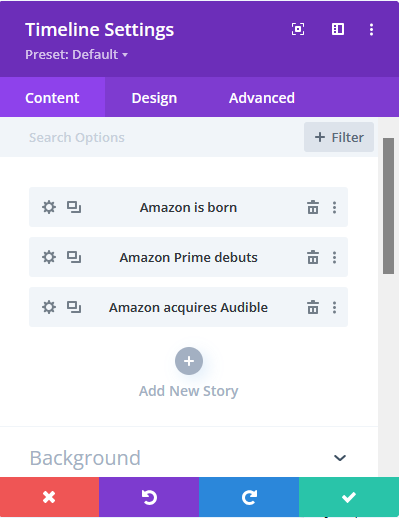
- To add a new story click on Add New Story button, new timeline will appear, now enter all the required details of timeline story.
- To edit the existing timeline, click on the settings gear icon. It will open the settings section for the selected timeline story, You will see four sections for the story.
- Story Content: In this section, you can add or edit your timeline story’s heading and description.
- Story Label: Here, you can add a year label for your timeline stories and also include content for the story label and sublabel.
- Story Media: You can add an image to your story in this section.
- Story Icon: Choose an icon for your story by enabling the icon toggle. By default, it is set to a dot.
These sections are responsible for the content of your timeline stories.
- You can also design your timeline story separately, such as creating a multicolor timeline. To do this, click on the Design tab from the editor, which will open the style section for that particular story. In this section, you will find all the color-related settings for header, description, labels, icons, and more.
- After editing, click the tick button in the modal editor to return to the parent wrapper, where you can see all your inserted timeline stories. You can now customize your timeline in the Design tab, just as you did for individual stories. Changes made here will be applied to the entire timeline. You can adjust layouts and customize your timeline stories.
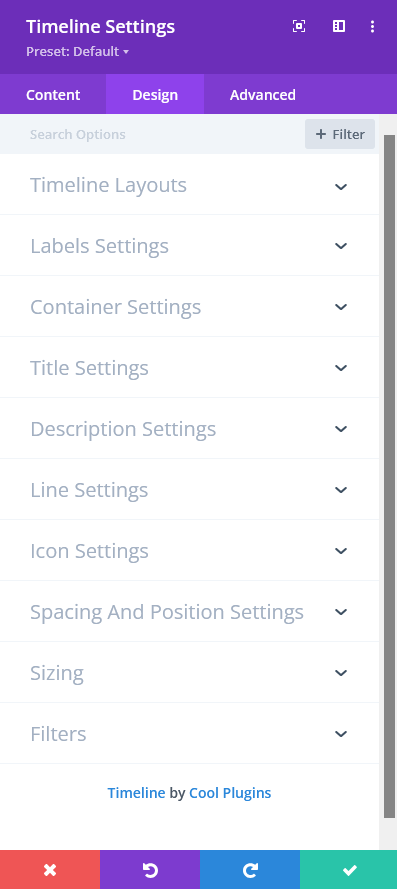
Step 3: Customization of Timeline
Click on the Design tab, inside this tab, you will see many sections for customization. Let’s go through all the sections you can see in the image.
- Timeline Layouts: In this section, you will see a dropdown with layout options. You can change the variations of the vertical timeline, such as both sides, one side left, or one side right.
- Label Settings: Customize all your timeline stories’ labels, including the year label, label, or sublabel. You can adjust colors, size, and font family for your labels.
- Container Settings: This section is for your timeline story box. You can add color, set padding, and apply different types of borders with colors.
- Title Settings: This section is for your timeline story title. Adjust color and font-related properties here.
- Description Settings: To edit your timeline story description, use this section. Customize the description text, set color, font family, and adjust line height.
- Line Settings: Customize the middle line of your timeline. Add an initial color and an on-scroll effect by clicking on Show Line Filling option and set the color for scrolling.
- Icon Settings: Add color to your selected icons. You can adjust the fill color and background color as desired.
- Spacing and Position Settings: Set the positions of your timeline story icons, labels, and the gaps above and below your timeline stories from this section.
This is the full overview of the Timeline Module for Divi. With this module, you can easily add and customize timelines for your Divi site. It’s a fully responsive timeline solution, allowing you to create colorful and adaptable timelines suitable for all screen sizes. Easily adjust colors, icons, and layout settings to match your site’s style.


