This Article will demonstrate how to mask images in SVG shapes in Elementor.
This article will cover:
- How to apply the mask to a widget?
- How to mask widgets using custom SVGs?
- How to mask a video widget?
Let’s see how to use the mask option in elementor which allows you to turn images into mask objects, and apply a shape to them which will hide the part of the content.
Masks are easy to use and can be applied to any element like an image, video or contact form, etc. To make stylish designs that can make your site stand out of the crowd let’s learn this.
How it works:
First of all, install the elementor page builder on your WordPress and go to the page where you want to use the mask option, and start editing it with elementor.
Mask a widget:
- Drag and drop the widget (like image, video, etc) on the page.
- We will now apply the mask on this widget to make it stand out.
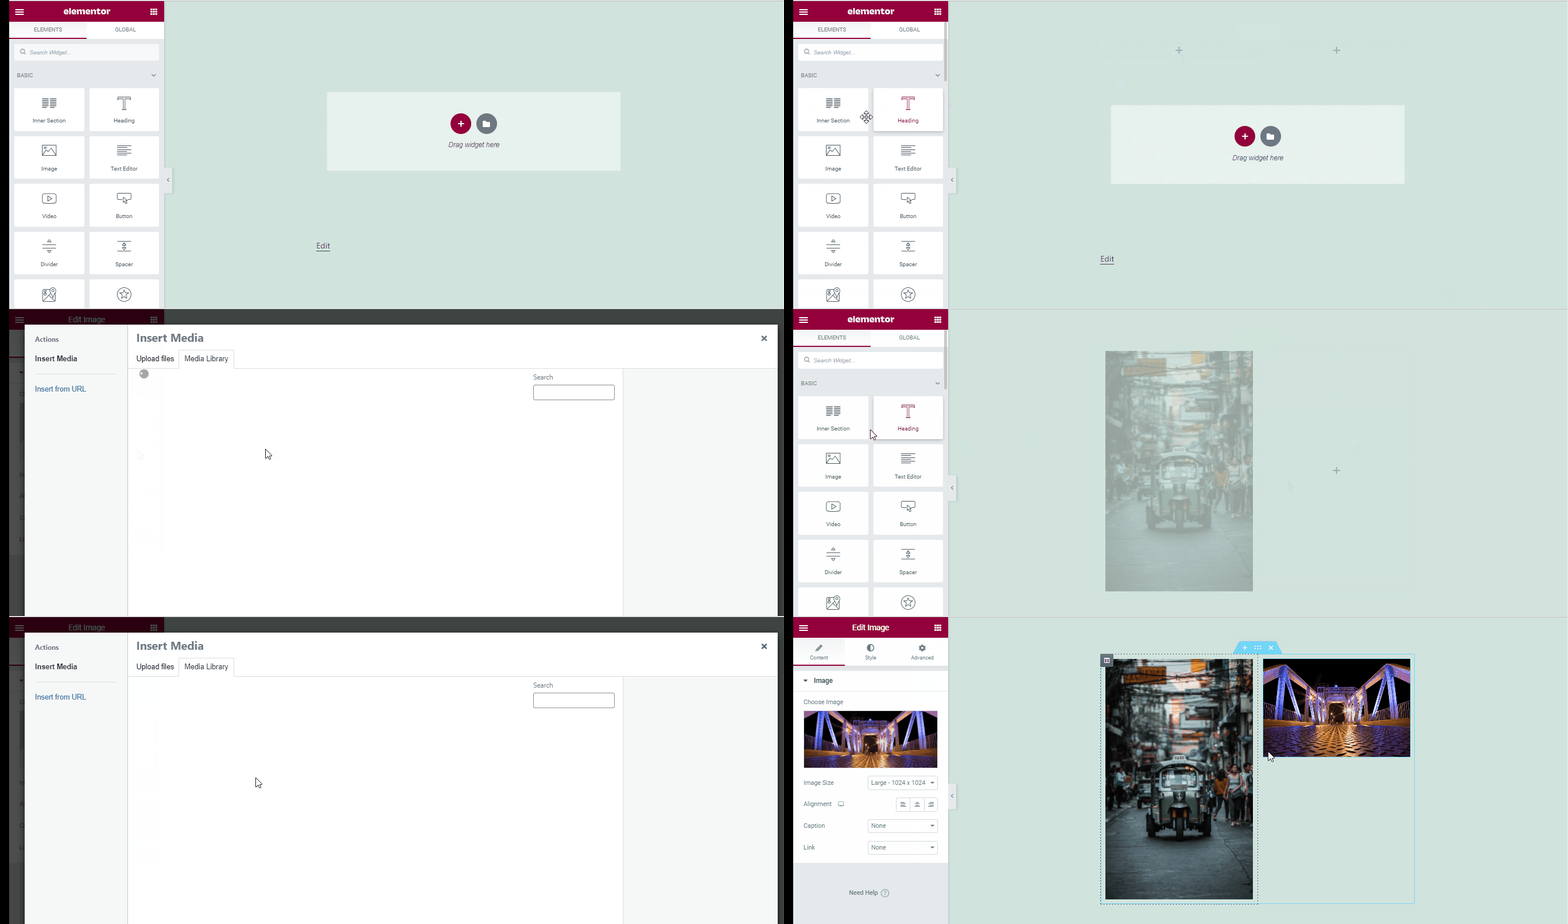
- You can find the mask option under the advanced tab of the widget.
- Advance tab >> Toggle the mask option to “ON”
- By default the shape is set to a circle, you can select many different shapes from the list.
- Now select the size of the mask to fit or fill. You can choose a custom option for a specific size.
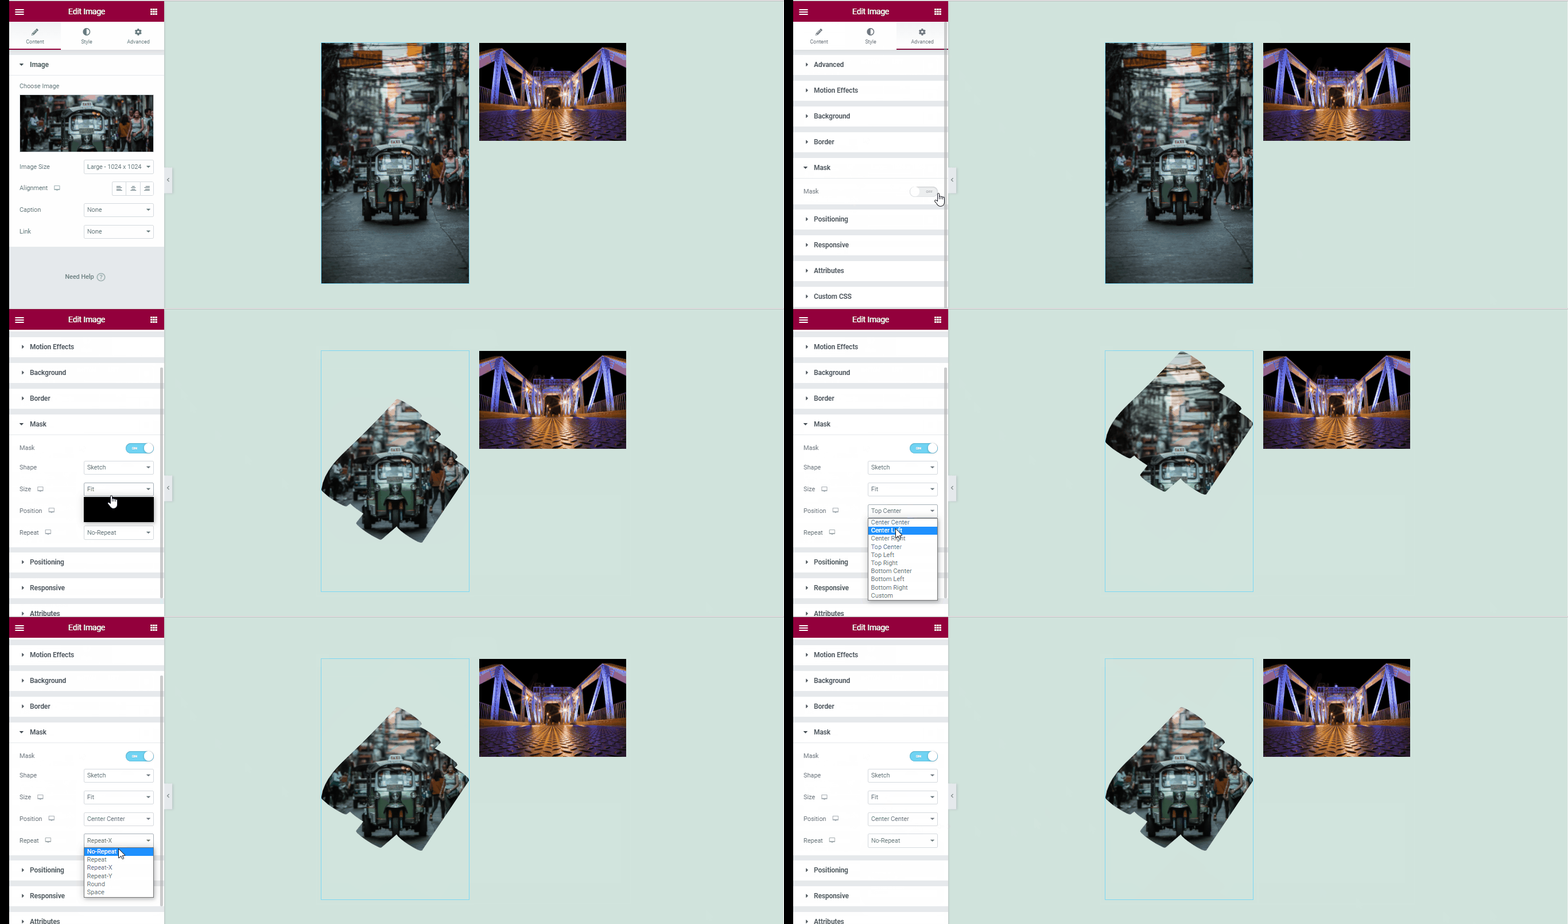
- Select the position of the mask and also choose to repeat the mask itself in a variety of ways, and select the one that suits your website.
Mask images with custom PNG shapes:
- Drag and drop the image widget on the page >> choose the image.

- Go to the style tag and add a hover animation.
- We will now apply the mask to this image to make it stand out.
- You can find the mask option under the advanced tab of the widget.
- Go to the advanced tab >> Under shape select custom.
- Upload the custom image.
- Upload the custom shape and the widget will mask according to the shape.
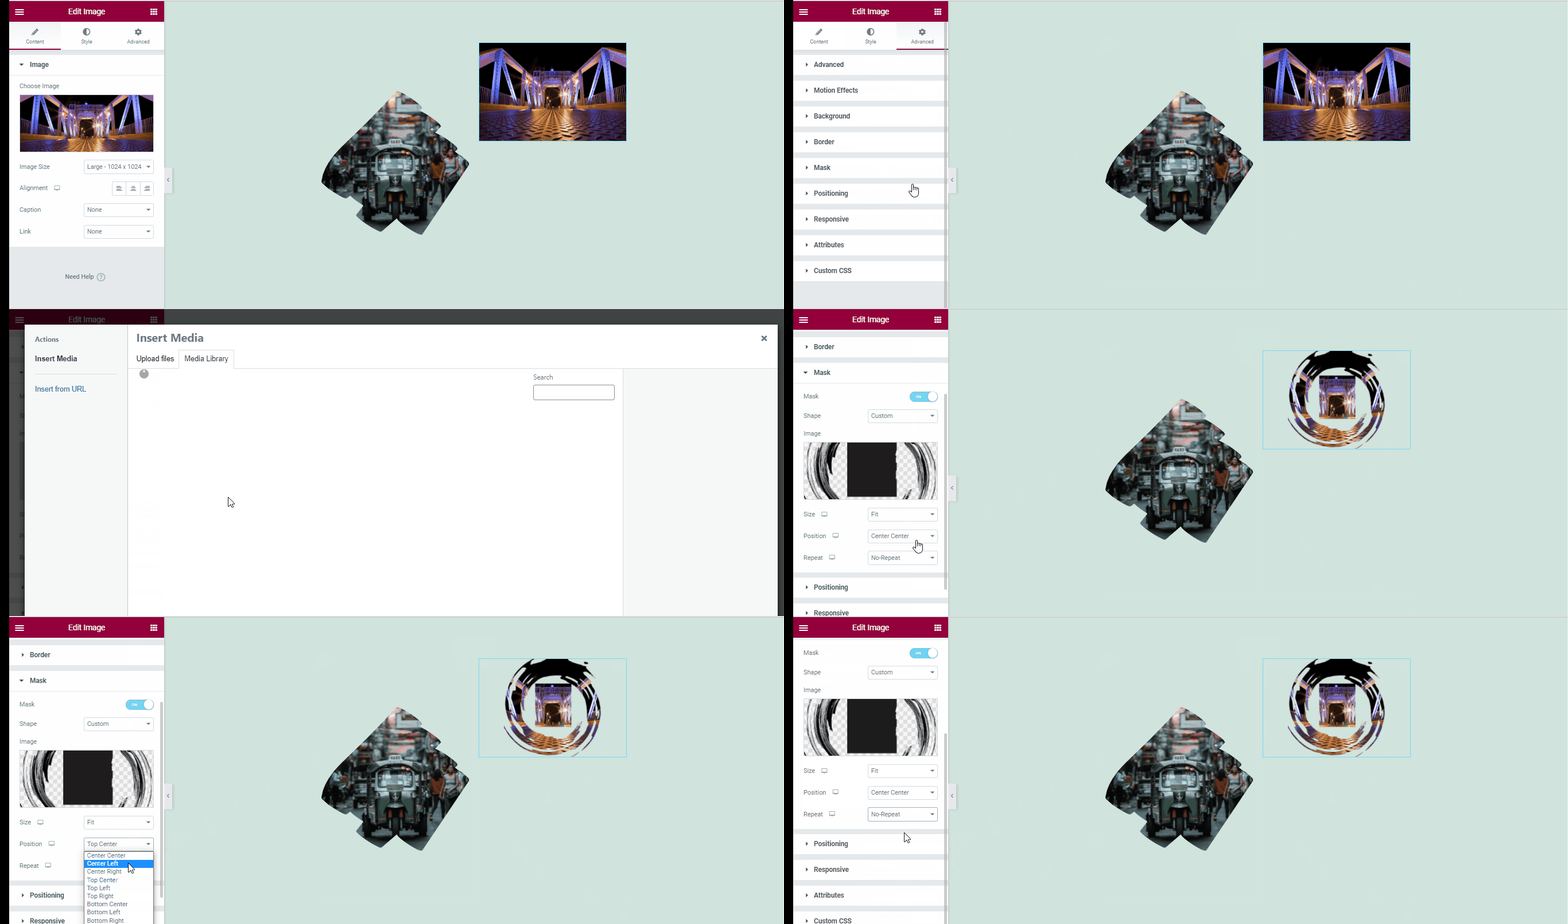
- Select the size, scale and make your mask stand out.
Mask a video:
- Drag and drop the video widget on the page >> choose the video.
- We will now apply the mask to this video to make it stand out.
- You can find the mask option under the advanced tab of the widget.
- Advance tab >> Toggle the mask option to “ON”
- By default the shape is set to a circle, you can select many different shapes from the list.
- If you want to create a more customized design choose a custom option and upload customized png or SVG mask shapes.
- Now select the size of the mask to fit or fill. You can choose a custom option for a specific size.
- Select the position of the mask and also choose to repeat the mask itself in a variety of ways, and select the one that suits your website.
Now you know how to use a mask on an SVG image, video and create a design that will really stand out. You can apply them to video widgets and create beautiful visuals that will bring your website to life.
There are many ways to play around with masks, let your imagination go beyond limits, and create the best designs.

