In a WordPress website, the main part of the visual looks is WordPress Theme Installation. WordPress themes allow you to design the front-end of your website. You can customize the functionality and can enhance your website.
In this tutorial, we will learn how to install a WordPress theme.
Installing Theme Using WordPress Directory:
The easiest method to install a WordPress theme is installing it from the WordPress directory(wordpress.org). There is a built-in option ‘Themes’ in WordPress. Search for themes in it and install it.
Search and Install the theme:
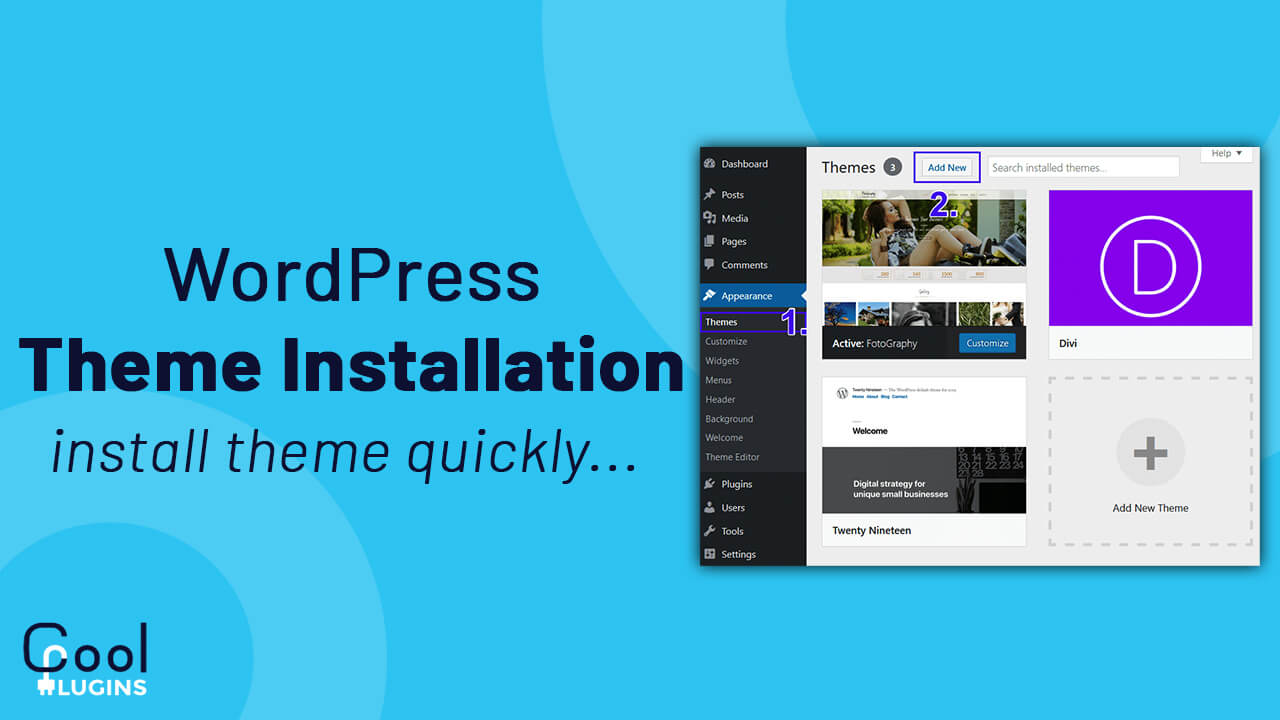
Now, go to the Appearance >> Themes option and click on the ‘Add New’ button at the top.
You will see a search box at the top right side of the theme search page. Here you can search for free themes.
You can use filters available on the search page. You can see the above image for reference. You can use filters and can search accordingly.
When you type and search for any keyword, you will get search results related to that keyword. So you can select what you want to install. You can also preview the theme before installing it as shown in the image given below.
As shown in the above image, I searched for Astra which is the most popular multi-purpose theme. You can build any type of website using this theme.
You can search for any theme according to your requirement to give a good look and enhance your website. There are other themes like GeneratePress, Divi, OceanWP, Ultra, Parallax, etc.
After searching, click on the install button to install the theme in your directory.
When the theme is installed, you will get an ‘Activate’ button. Click on the button to activate the theme. Now you are ready to go.
Note: You can switch to any theme from the list of installed themes or you can search for a new theme. Make sure you keep the backup of any changes or customizations in the theme.
Upload and Install the Theme:
It is almost similar to the above method. In the search page, after clicking on the Add New button, you can upload your custom theme. Or you have purchased the theme from ThemeForest market or other authors.
If you want to install a WordPress theme by this method, then use Enfold theme for example to upload. I have a zip file/folder of all the files.
Click on the upload theme button. You will see the upload form.
After selection, the zip folder of the theme clicks on the Install Now button. Your theme will now be installed. Now you can activate the theme.
So this was the first method to install WordPress themes using the WordPress directory.
Installing Theme Using FTP:
If you have a theme and you want to install using FTP then you can follow this method. This is an advanced method and not for beginners.
For this method, you need to download your theme’s zip file and unzip it on your computer. Now you will get a folder with a theme name and now it is ready to upload through FTP. Follow the basic steps.
- Login to your FTP account using FileZilla, WinSCP, Cyberduck, or AnyClient. I would recommend FileZilla if you work on Windows and Cyberpunk if you work on Mac.
- Follow this path /wp-content/themes to open the themes folder.
- Now right click on the path and click on upload option to upload the file. You can drag your theme folder in the path.
- You will get a success message after it is uploaded successfully.
- Now, your uploaded theme will be visible on the admin dashboard. You can go to ‘Appearance >> Themes’ to check.
- Activate your theme and enjoy the design of your website.
So that’s it from this article. I hope you learned how to install WordPress themes using the WordPress directory and FTP.


